Here is this month's collage of finished quilts. Actually, there are two collages because I had too many quilts to fit in one!
Happy New Year to everyone! May 2015 bring you much peace and joy.
Here is this month's collage of finished quilts. Actually, there are two collages because I had too many quilts to fit in one!
Happy New Year to everyone! May 2015 bring you much peace and joy.
It is a remake of a quilt I made several years ago, using Joel Dewberry's Modern Meadow collection, and my Bricklayer pattern.
This is a great pattern for showing off some larger scale prints.
I wasn't sure what to back it with, and then I remembered the backing fabric I rejected for this quilt a week ago. Perfect!
Reminder: my patterns are on sale through New Year's Eve in my Etsy and Craftsy shops!
Once upon a time, Pantone announced their 2014 color of the year was Radiant Orchid:
And a quilter got really excited. Because this color appealed to her. And because this was the year she was going to enter the Pantone Quilt Challenge. So she went online and did some fabric shopping:
And she found some grey Moda charm packs in her stash to use as the background (Bella silver?). So she cut up her radiant orchid fabrics and made a bunch of half-square triangles. Because even though she didn't have a plan yet, half-square triangles are always a good place to start, right?
And then suddenly it was March. And March is always a crazy month. And she was besieged by a surge of custom orders on Etsy.
And she missed the entry deadline.
So, then the challenge went from being an online one to a personal one. But that's okay. Because in May, she had a brainstorm about what to do with those half-square triangles:
(Remember -- my PDF patterns are on sale for the next few days in my Etsy and Craftsy shops!).
They are fun to make, and a great way to use up scraps. Check out my tutorial, and get a head start on next year's presents!
I have some big news. In case you haven't heard, new regulations that take effect January 1st require anyone who sells digital products to customers in the EU to pay VAT on those sales, regardless of what county the seller resides in. I currently sell automatic downloads of my quilt patterns on both Craftsy and Etsy, and like many other small businesses, I am unable to deal with the paperwork that would be involved in cooperating with this regulation. Therefore, as of January 1st, the following changes will take place:
1. My Crafsy pattern store will be closed completely
2. My Etsy store PDF patterns will no longer be available as instant downloads, and will only be available to customers in the US, Australia and Canada.
After December 31st, PDF patterns bought on Etsy will be emailed within 24 hours of purchase (usually much sooner). The reason I am limiting sales to the US, Canada and Australia is because I have found that most of my pattern sales come from these countries, and because of the time it would take to customize shipping profiles on all of my Etsy pattern listings to include every country except those in the EU.
I am really sad about losing the instant download feature -- I loved the idea that someone halfway around the world could purchase my pattern while I was sleeping, download it immediately, and possibly finish making the quilt top before I woke up! Etsy announced recently that it is working on some seller tools to deal with this VAT issue, so I am hopeful that in the not-too-distant future, I will be able to offer automatic downloads to all non-EU countries.
Because of all of these changes, I am offering a sale on all of my PDF patterns in both my Etsy and Craftsy shops (from now thru around 11 PM EST on December 31st!). If you are in the EU, or if you prefer the instant download feature, please take advantage of this sale before everything goes away on January 1st! No coupon code required -- patterns are already marked down!
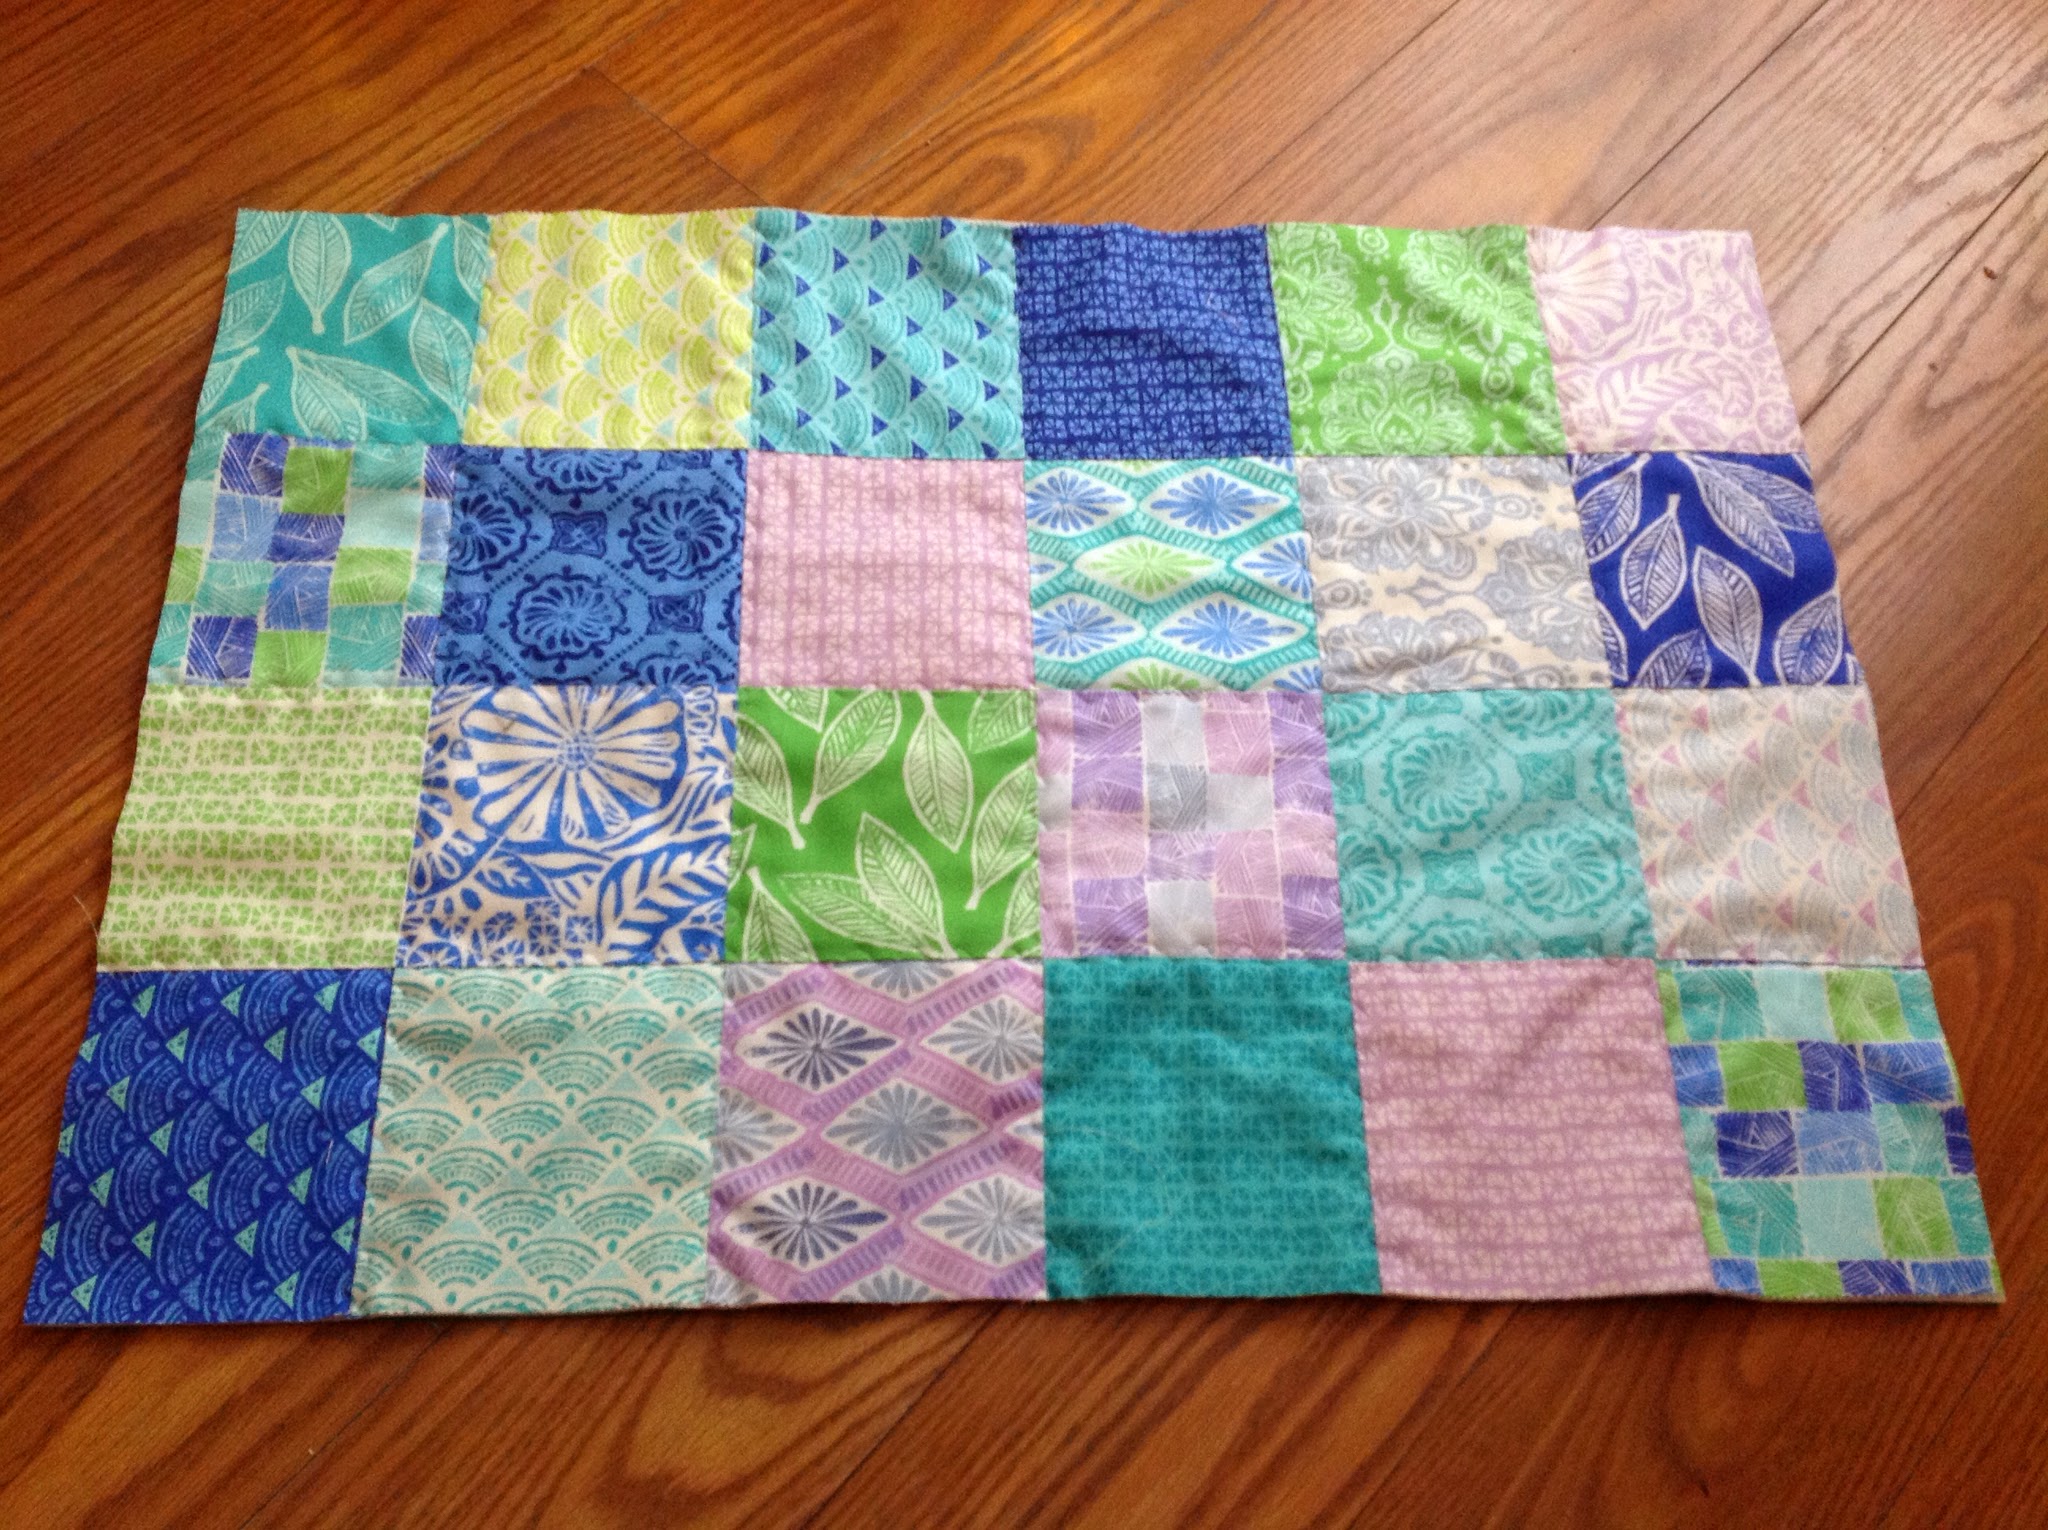
Yesterday, I shared a quilt I made for my daughter's twin bed for Christmas. Today, I'm sharing a tutorial on how to make a matching full-size pillow sham from leftover charm squares.
You will need:
24 charm squares (or 30 if your pillow is pretty fluffy -- I'll explain below!)
Approx 1/2 yard to 5/8 yard of fabric for backing (again, fluffiness factor!)
20 x 28" batting scrap (I attached several smaller batting scraps together with a zig zag stitch)
20 x 28" piece of fabric (this will be hidden on the inside)
Optional: binding strips (three 2 1/2 inch x width of fabric strips should be plenty)
Sew your charm squares together in 4 rows of 6. To quilt the front of the sham, I layered my pieced charm squares, batting and scrap cotton piece and used a decorative stitch through all of the seams. (Note: photos were taken after I quilted and trimmed off the excess backing and batting!) You can see the stitch better from the inside view (below). You could also quilt 1/4 inch on either side of the seam, or practice your free-motion quilting if you prefer!
I did trim the length of the quilted piece 3/4 inch on either side before assembling the pillow, so my final measurement was 18 x 26". If your pillow is fluffy, make five rows of six, and after quilting, trim 3/4" off both sides of the length, and about 1 1/4 inches off the top and bottom. This should yield the standard 20 x 26" measurement.
For your pillow backing, measure the width of your pillow (mine was 18") and cut two pieces 18" (or your width) x 18". Disclaimer -- I actually cut my pieces a little extra long, which made the pillow a bit tricky to stuff inside. I also was lazy and used the untrimmed selvege edge instead of hemming the two envelope flaps! Normally, I turn under and stitch a 1/2" hem on the two envelope flaps before assembling the sham. If you are using directional fabric, be sure to put the hem on opposite sides (otherwise one of your envelope flaps will be upside down)! Lay the first envelope flap, right sides together, over your quilted sham top.
Lay the second envelope flap on top and pin. Stitch around all four edges (I used a 1/4" seam, but you can go a little wider, especially if you are working with the 20" x 26" size. Turn inside out and admire your work!
Hope you enjoyed this tutorial!
I hope you enjoyed this journey of 25 Quilts in 25 Days. I also have some fun posts scheduled for the remainder of the month, including a pillow sham tutorial, some Christmas stockings, a pattern sale, and of course, my final monthly collage of finished quilts for 2014!