Showing posts with label tutorial. Show all posts

Sunday, December 28, 2014

Christmas Stockings and a Tutorial Link

This year, I finally made some new Christmas stockings for us! Last summer, we repainted our living room. I can't remember the color name, but it is purple (this was actually my husband's idea, not mine) -- sort of a pale periwinkle purple that reads a bit grey depending on the time of day. I actually like it a lot, even though I resisted at first. Anyway, we've never had four Christmas stockings that match each other, so I used the scraps from my daughter's quilt (Kate Spain's Horizon fabric collection) and my tutorial (found here) to make us a new set that matches the "cool" color palette of the room.

They are fun to make, and a great way to use up scraps. Check out my tutorial, and get a head start on next year's presents!


Friday, December 26, 2014

Tutorial: Charm Square Quilted Pillow Sham

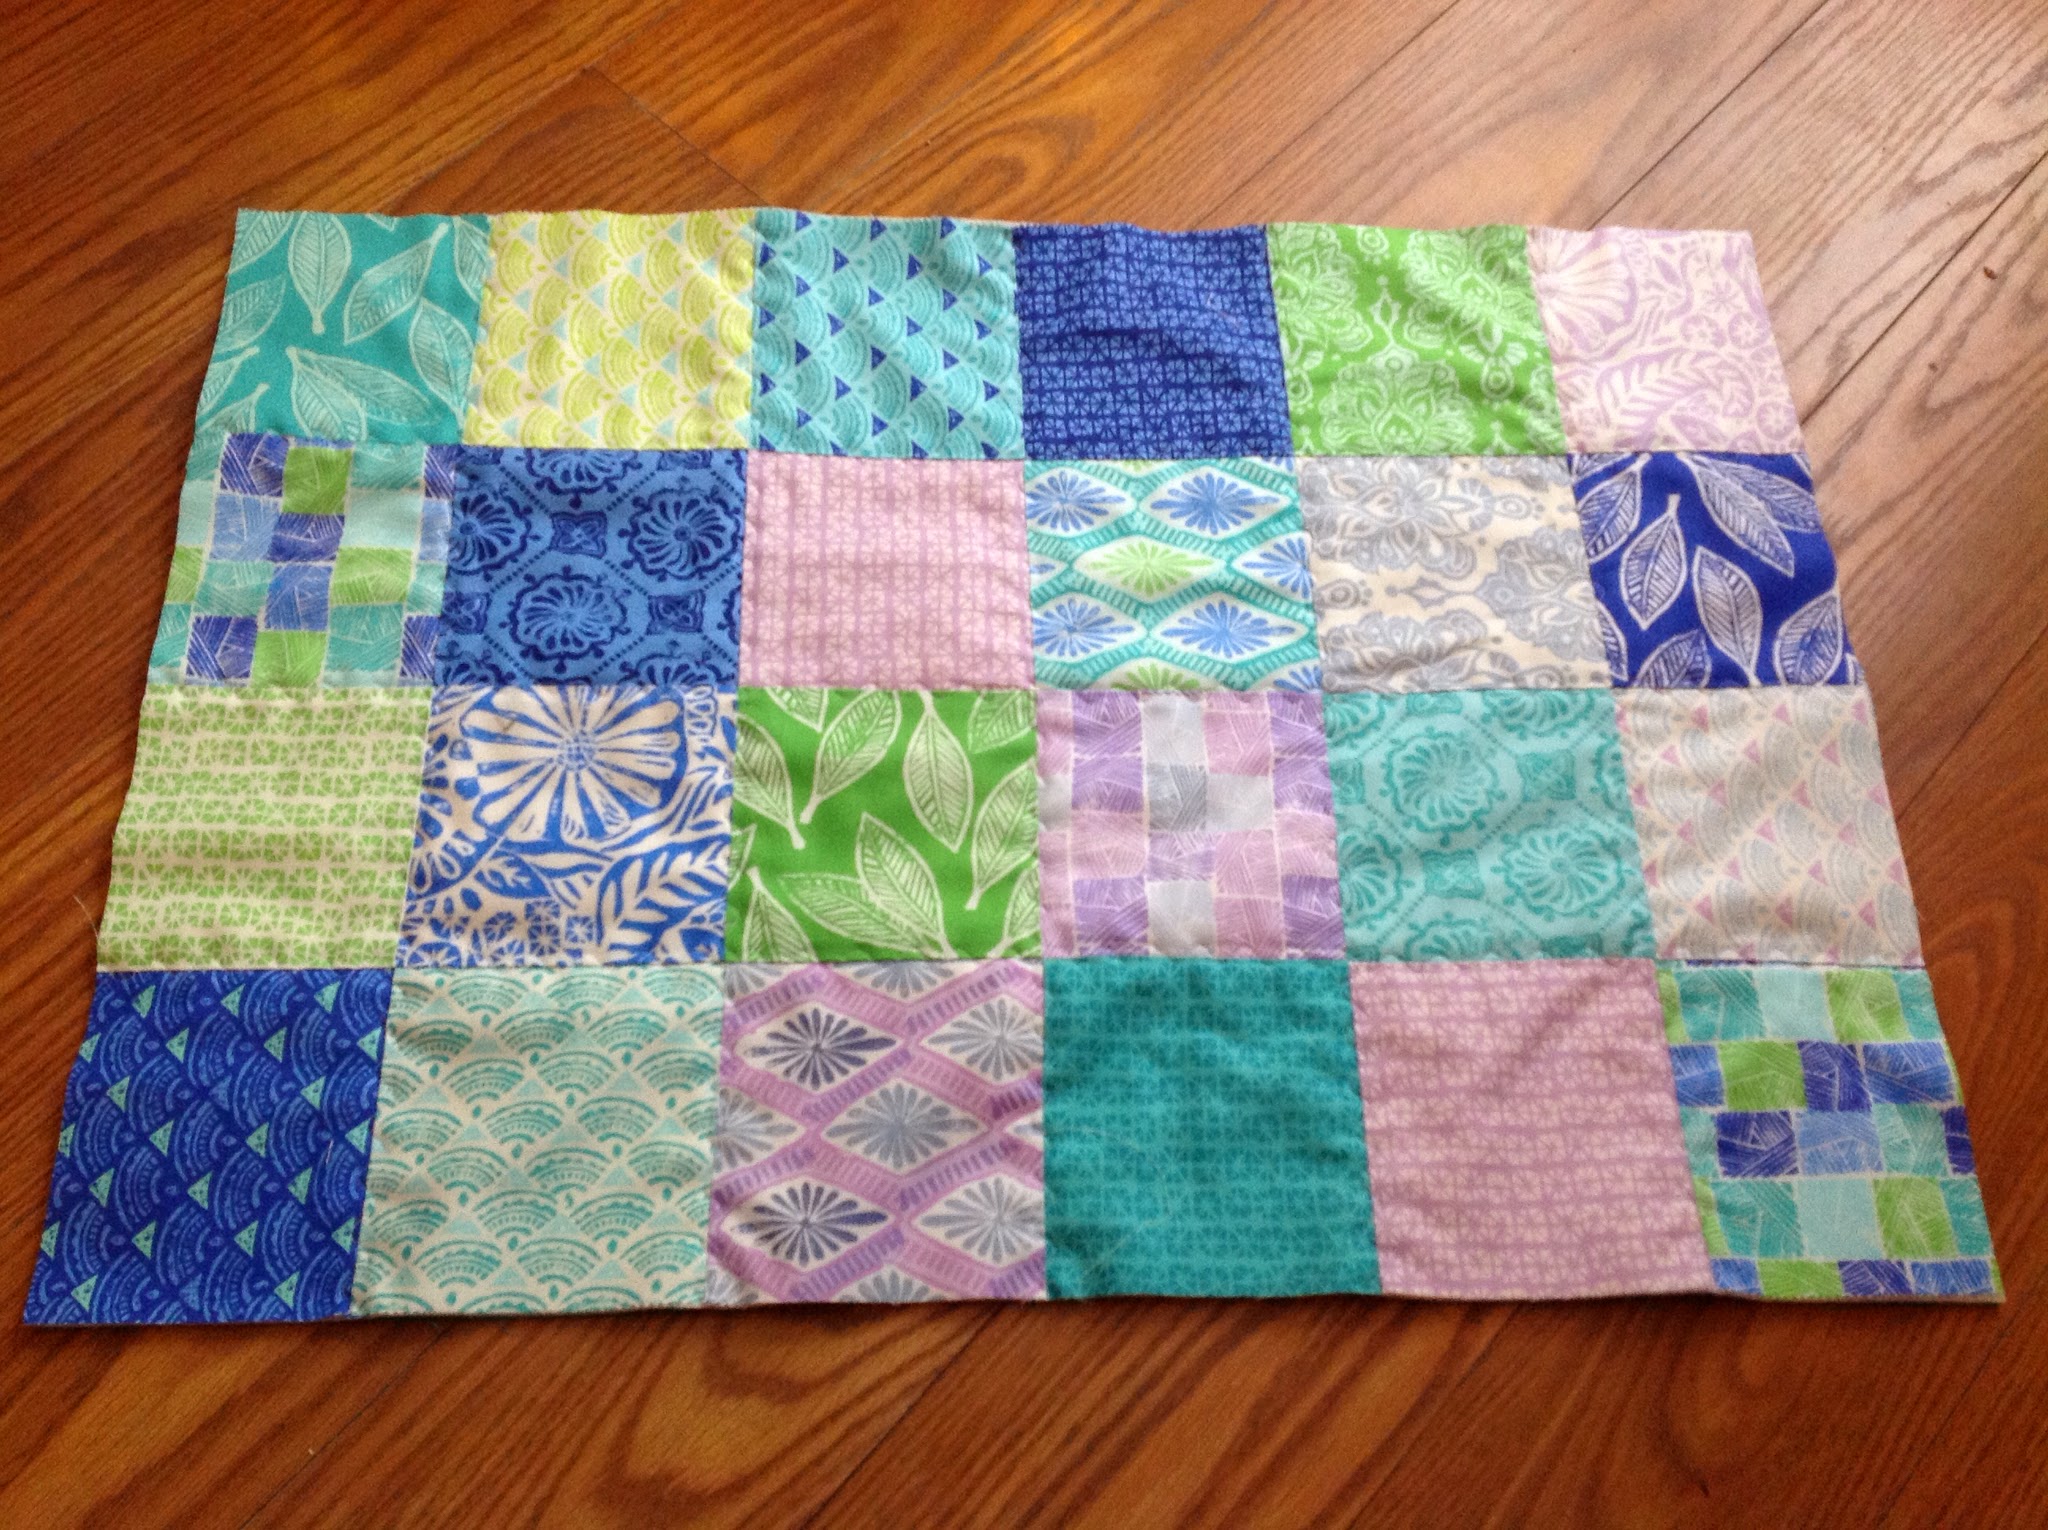
Yesterday, I shared a quilt I made for my daughter's twin bed for Christmas. Today, I'm sharing a tutorial on how to make a matching full-size pillow sham from leftover charm squares.

You will need:

24 charm squares (or 30 if your pillow is pretty fluffy -- I'll explain below!)

Approx 1/2 yard to 5/8 yard of fabric for backing (again, fluffiness factor!)

20 x 28" batting scrap (I attached several smaller batting scraps together with a zig zag stitch)

20 x 28" piece of fabric (this will be hidden on the inside)

Optional: binding strips (three 2 1/2 inch x width of fabric strips should be plenty)

Sew your charm squares together in 4 rows of 6. To quilt the front of the sham, I layered my pieced charm squares, batting and scrap cotton piece and used a decorative stitch through all of the seams. (Note: photos were taken after I quilted and trimmed off the excess backing and batting!) You can see the stitch better from the inside view (below). You could also quilt 1/4 inch on either side of the seam, or practice your free-motion quilting if you prefer!

This piece will measure approx 18" x 27 1/2 after quilting. The standard measurement for making a pillow sham is usually 20" x 26" , but I usually find that a little narrower is okay (I like a snug fit!)

I did trim the length of the quilted piece 3/4 inch on either side before assembling the pillow, so my final measurement was 18 x 26". If your pillow is fluffy, make five rows of six, and after quilting, trim 3/4" off both sides of the length, and about 1 1/4 inches off the top and bottom. This should yield the standard 20 x 26" measurement.

For your pillow backing, measure the width of your pillow (mine was 18") and cut two pieces 18" (or your width) x 18". Disclaimer -- I actually cut my pieces a little extra long, which made the pillow a bit tricky to stuff inside. I also was lazy and used the untrimmed selvege edge instead of hemming the two envelope flaps! Normally, I turn under and stitch a 1/2" hem on the two envelope flaps before assembling the sham. If you are using directional fabric, be sure to put the hem on opposite sides (otherwise one of your envelope flaps will be upside down)! Lay the first envelope flap, right sides together, over your quilted sham top.

Lay the second envelope flap on top and pin. Stitch around all four edges (I used a 1/4" seam, but you can go a little wider, especially if you are working with the 20" x 26" size. Turn inside out and admire your work!

One last note: I usually serge the inside seam so that if will hold up through frequent washings. If you do not have a serger, then a wide zig-zag stitch would also do the trick ( do this step after sewing the pillow back and front together with a regular straight stitch). Another fun option is to sew the pillow back and front WRONG sides together (in other words, with your finished sides facing out while you sew) and then finishing the 1/4" raw edge with a contrasting binding (exactly the way you would attach a quilt binding).

Hope you enjoyed this tutorial!


Friday, July 26, 2013

Finish It Up Friday: Christmas in July!

One of my ten summer goals is to make some Christmas stockings using this tutorial.

This week, I finished up a set of four stockings using Kate Spain's Joy collection for Moda.

The stockings are such a great way to use up batting and fabric scraps, and they come together quickly using a quilt-as-you-go method.

I also started this set of stockings using Vintage Modern by Bonnie and Camille for Moda. It's fun to use non-holiday collections to match a room's decor!

My other finish this week was completing the binding on this sweet Posy quilt in a Disappearing Nine Patch pattern!

Linking up to Needle and Thread Thursday at My Quilt Infatuation, and Amanda Jean's Finish It Up Friday.


Sunday, December 16, 2012

Tutorial: Quilted Christmas Stockings

Since we're having a bit of this today....

...I thought it would be the perfect day to share my first-ever tutorial! I've been making some quilt-as you go patchwork stockings and promised in an earlier post that I 'd share what has worked for me!

First, a disclaimer: You will need to provide your own stocking template. You can use a ready-made stocking as a template (be sure to add 1/4 inch around the finished edge for seam allowances), or use a template from another pattern, or even draw your own. I used the stocking shape from this pattern as my template. You could also look online for free stocking templates.
 

Here's what you'll need for the project:

  • Some scrap strips (jelly rolls or Moda scrap bags work great!
  • Batting pieces (large enough to cut two stocking shapes)
  • Backing fabric (large enough to cut one stocking shape)
  • Lining fabric (two stocking shapes)
  • Piece of leftover binding (2 1/2" double-fold straight of grain)
First, you'll need to trace your stocking pattern onto a piece of batting. Be sure to trace it with the toe facing the same direction you would like it to be in the finished product. Do not cut out. (By the way, you'll see some zig zag stitching on my batting -- I piece batting together by butting two trimmed edges against each other and securing with the zig zag stitch.


Next, stitch on the drawn line with a straight stitch. The reason for this step is that it will transfer the shape easily to the reverse side so that you'll be able to cut it out once you've covered it with strips.

Place your first strip in the center. Be sure the edges extend a little past the drawn line.

Place your second strip next to your first strip to make sure it will be long enough to cover the template.

Put the second strip on top of the first strip, right sides together. Stitch a quarter inch seam through both strips AND the batting.

 
Unfold the second strip and press. Your stocking should look like this:


Continue adding strips. As you get near the toe area, be sure to cut your strips long enough to cover the drawn shape when unfolded. In fact, you should cut them a little longer just to be safe!

Trust me -- you don't want to end up with this-- see how the red strip falls short of the drawn line after stitching? That means seam ripping will follow!

 
Continue to add strips until your entire stocking shape is covered.


Now, flip the piece over and use the outline you stitched in the first step to cut out the shape. Cut right on the stitched line.

When you're done cutting...

...flip it over and admire your work!

Now, layer another piece of batting, your backing fabric, and your quilted stocking front. Backing and stocking front should be right sides together. If you wish, you can omit the batting, but I like the extra body it adds to the stocking. This batting piece should be on the bottom. Pin the pieces together.

You don't need to cut out the stocking shape from the backing and batting yet. Stitch through all layers 1/4 inch from edge of stocking front. Be sure to backstitch at the beginning and end, and leave the top opening of the stocking unstitched.


Trim backing and batting even with stocking front and clip around the curved edge, being careful not to clip stitching line.


Turn your stocking inside out, and press.


Cut two stocking pieces from lining fabric; sew together with a 1/4 inch seam and clip curves.

It was hard to get a picture of this next step! Leaving the lining wrong side out, stick your hand inside like an oven mitt, and push the lining inside the stocking. Make sure the toe parts end up in the same place! (Again, trust me on this!)

Pin raw edges together at the top, matching seams. Baste.

At this point, you can add your hanger. You can use a piece of ribbon, or you can make your own tab. Cut a 2 1/2" x 5" rectangle, fold in half right sides together and stitch 1/4 " seam on long edge (secure beginning and end with backstitch).

Turn tube right side out, press, fold in half with raw edges together. Stitch to stocking, lining up raw edges (I like to center it on the heel seam).


Turn stocking inside out. Sew your leftover binding strip to the top. You may want to attach it first with a basting stitch, as in order to join the ends diagonally as you would on a quilt, you'll need to have some of it free, and I found that every time I did this step, I needed to detach more than I thought to maneuver it in order to join the ends. Once the ends are joined, you can resew the binding edge.

Turn stocking right side out, fold binding over, and machine stitch to secure it. Press stocking, then admire and enjoy!